- Home /
- Drum handling /
- Drum Tools
Shop Now
- AdBlue
- Air Diaphragm pumps
- Air Equipment
- Degreasers / Detergents / Sanitisers
- Drum handling
- EASICULT Range
- Electrical
- Firefighting
-
Fittings/Pipes/Flanges
- Adaptors - other
- Allthreads
- Backnuts
- Bauer Fittings
- Bends
- Bitumen fittings
- Caps
- Claw couplings
- Combination Nipples
- Compr. Couplings
- Crimp fittings
- Cross Over nipples - NPT to BSP
- Crosses
- Elbows
- Flanges
- Hex Nipples
- Hex Socket
- Hex Weld Nipples
- Hosetails
- Pipes
- Plugs
- Reducing Bushes
- Reducing Nipples
- Reducing Sockets
- Sockets
- Storz Fittings
- Tank Inlet
- Tees
- Toe Nipple
- Unions
- GIVE AWAYS
- Hire
- Hoses (Bowser/Truck/Industrial)
- Lubricants / Sealants / Coolants
- Machinery - Engine powered
- Measuring Equipment
- Miscellaneous
-
Petroleum Equipment
- Bowsers
- Break-aways
- Camlocks/Caps/Plugs/Seals
- Dip / Fill (Markers, Spill boxes
- Dry-breaks
- Farm Tank Related
- Filters / Strainers
- Flowmeters / Registers
- Forecourt Driveway bins and Accessories
- Fuel Nozzles
- Fuel Trailers
- Fuel Treatments
- Hose Reels (Also see workshop eq
- Hose Retrievers
- Jerry Cans
- Leak Detectors
- Loading Arms
- Petrolatum Tape
- Petroleum Miscellaneous
- Pumps
- Sight Glass
- Suction Stubs
- Swivels
- Tank Truck
- Tanks
-
Valves
- Anti-spillage Valve
- Ball Valves
- Bib Valves
- Butterfly Valves
- Check Valves
- Foot Valves
- Gate valve
- Loading Arm Valves & Vac Breaker
- Pressure Relief valves
- Push button valves
- Service station Valves
- Solenoid valves
- Treacle Valves
- Vapour Recovery
- Vents
- Water Detection / Gauging
- Rak.a.van
- Rubber / Gaskets
- Safety (Signs, Gloves)
- Spare Parts
- Spill Management
- Water Treatment Systems
- Workshop equipment

Drum Tools
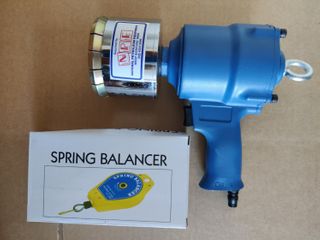
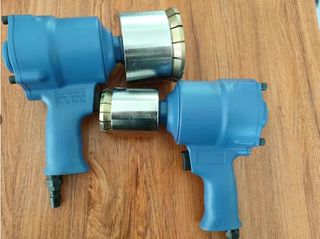
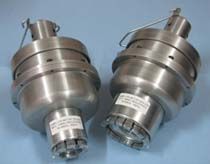
How to adjust the blue pneaumatic cap sealing crimper: (Stock code: 2094)
This process requires patience, do not rush through it!
Step 1: Adjust the inner screw to the diameter of the seals to be used. (This affects the tighness/force of the crimp)
Step 2: Adjust the outer large screw/disk to the depth to be crimped with about 1mm of seal showing. (This adjusts the crimp height in relation to the bung and has an effect on the pinching of the seal, if its adjusted too low the seal will be pinched).
Step 3: Test using some seals to ensure the correct crimp is achieved and is consistant. If the desired result is not achieved, repeat steps 1 to 3 until the desired result is achieved.
The correct adjustment will result in a PERFECT crimp without pinching and the seal is 'very tight' and it cannot be spun by hand.
This works on TRI-SURE and equivalent seals, as experienced by NPE, first hand, adjusting the crimper.


